Friday, April 30, 2010

And..... It's A Boat!


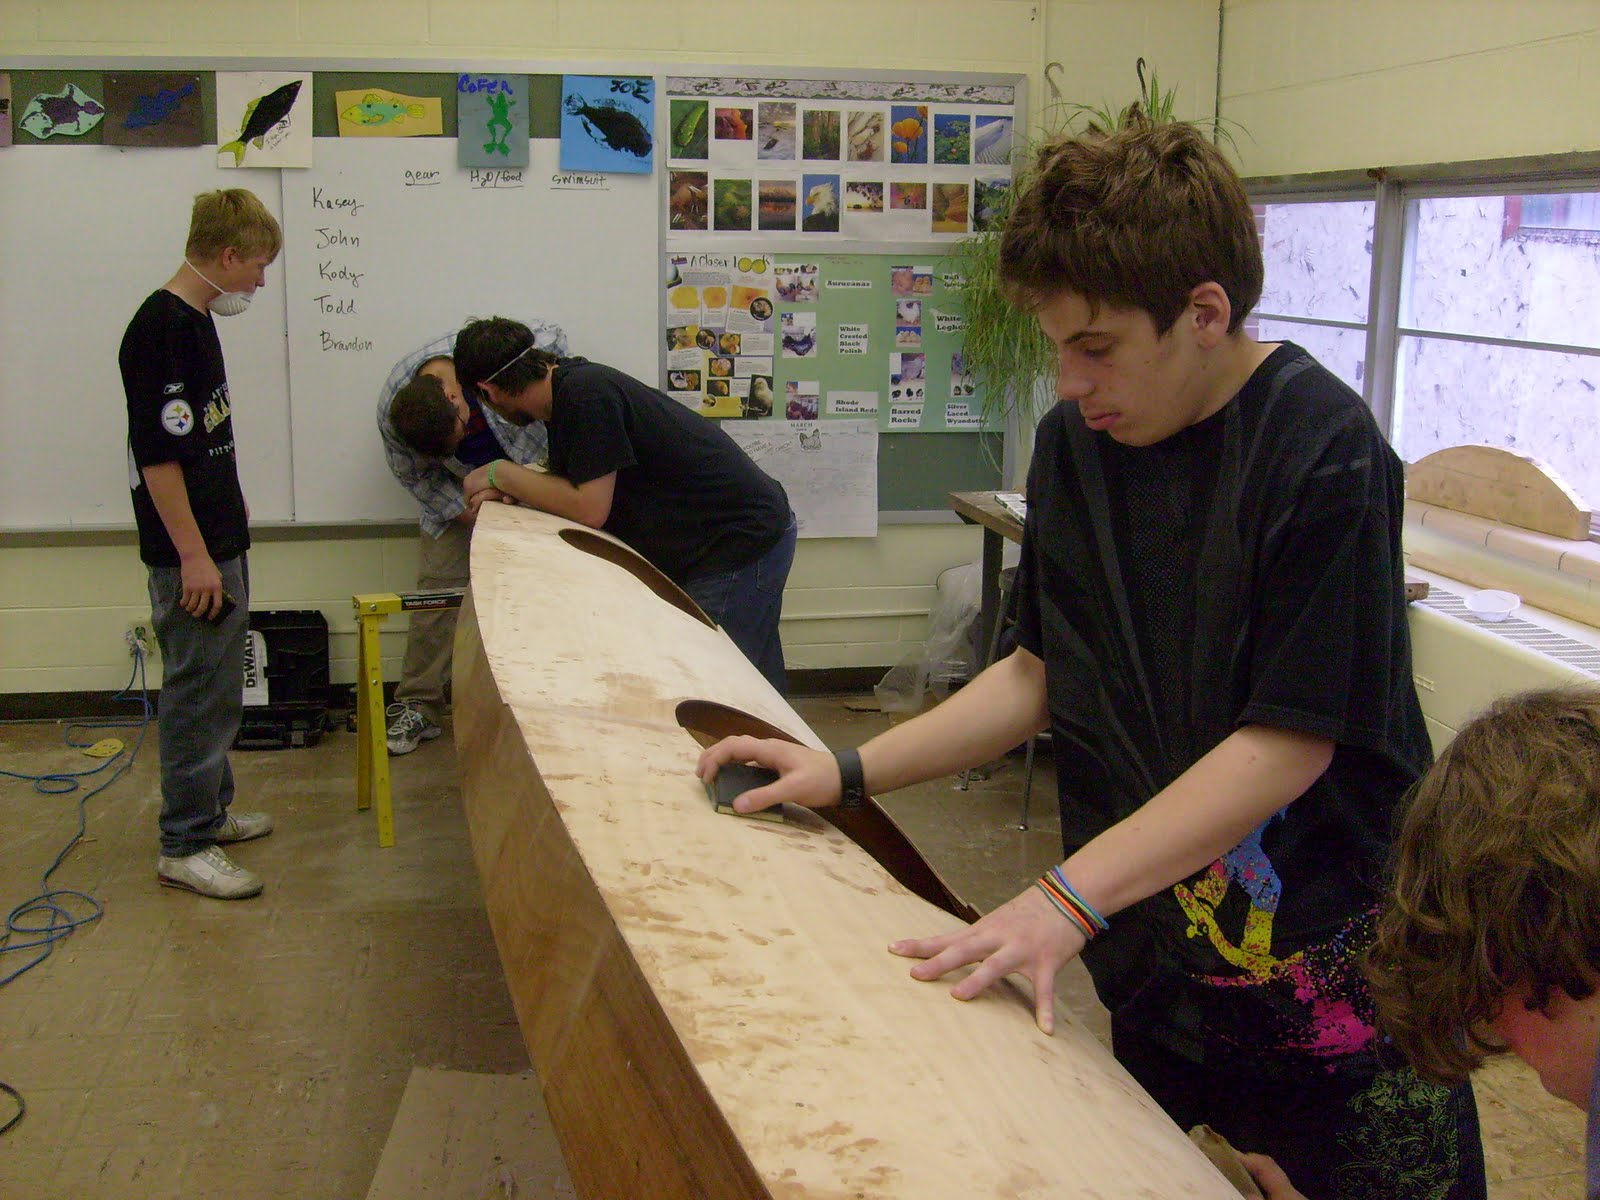
At the YBEC Frankford campus, we have realized several things lately. First, we have not blogged or posted pictures in over a month. Why? Not because the students stopped working on the kayak, in fact, it is quite the opposite. We have been in the midst of not only a month long push to finish the boat, but also a myriad of projects and student activities including starting and working the garden, tending to an ever-growing flock of chickens, adventure trips, and after school clubs such as climbing, skateboarding, and fishing club. Somehow, in the midst of all of that, we have almost completed the boat. Second, we realized a few weeks ago how quickly our four day was coming up, which is when we planned to launch the boat. That launched us into "sweatshop mode" in which students daily sanded, epoxied, fiberglassed, sanded, sanded, sanded, and sanded some more. The third thing we realized as we worked this week was, WE HAVE A BOAT!!!!!!! The kayak is basically finished with the exception of a few finishing touches, and will be carefully lifted out of the art room window (which Lane and I took off of its hinges today.....shhhhhh, don't tell Big Spring School District), and ceremoniously launched next week at Cape Henelopen, Deleware.

Tune back in to the blog shortly to see student's writing and impressions about building the boat, and photos of the final creation. We are so excited to have completed our project, and are continuing to be so impressed with our students and the work they have put into the kayak!!

Wednesday, March 17, 2010

It's a Sanding Party!

So the guys came in the art room to work on the boat and asked, "What are we doing today?" Telling them that they'd have to snip all of the copper wire stitches they'd meticulously installed, file them and then spend several hours sanding the boat hull until the rough angular hull had a nice rounded shape didn't seem like the most inspiring way to start the day so instead I said, "It's a sanding party!"

The word party in the title helped but when I backed this up with the little grill, some burgers, dogs and chips, the guys were excited to do some work. We turned on some classic rock and snipped , filed and sanded the hull into what's turning out to be a beautiful Chesapeake Tandem hull. The guys actually enjoyed the sanding and they're quite proud of their accomplishment.


The remnants of the copper stitches.

The guys started looking at the hull and said, "Hey, this will float!"

In the photo from left to right: Neil, Matt, Ben, David (great job with those tricky filings!), Danny and Lane. Great job guys!

Friday, March 12, 2010

MMMMmmmm......Is That Peanut Butter?


This week the students taped all of the interior seams on the kayak, and filled them with a thickened epoxy mixture. The mixture, which looks (but doesn't taste!!!!!!) like peanut butter, is made of epoxy resin, slow hardener, and wood flour, and is called a "fillet." We used flexible plastic tools to press and smooth the messy concoction into the keel, chine, and bulkhead seams. This will keep water out, and begins to hold the boat together so that we can eventually take out the copper wire stitches that initially held the boat together. Over the wet epoxy fillet we pressed fiberglass strips into place. The final step was to brush a thin layer of liquid epoxy over the seams, fiberglass strips, and entire inside of the kayak. Lane and I were both really impressed with the ability of the students to make neat seams and work with the epoxy, since it is a messy and often tricky process. We are all so excited that the boat is taking shape and progressing quickly, and we CAN'T WAIT to take out the copper wire stitching so that we don't get cut and poked anymore while we are working on the boat.

Tuesday, March 9, 2010

Does it Float and Can We Take it Over Double Hydraulic?


The answer to both is, NO!, but those have been actual questions I have been asked. The kayak probably wouldn't float yet, although the students keep wondering. This week we discussed more of the parts of the kayak and how it differs from the whitewater boats that we are most familiar with at Yellow Breeches. So, no, it can't go through Double Hydraulic or any other rapid on the Yough. However, we have gotten far enough that the project definitely looks like a kayak and appears to have beautiful lines.

The boat has some epoxy seams completed and we have been busy laying down tape to complete the rest of the seams. Last week a group of students installed the bulkheads, which will separate the cockpit paddling area from the gear storage compartments. Once all of the seams have been epoxied (with a mixture of Epoxy Resin, hardener, and wood flour), we can take out the copper wire stitching that has held the boat together for so long. We are all looking forward to that so we won't be stabbed by the wires anymore and because it means we no longer have to worry about the boat twisting into a bad shape. It will have become stiff from the epoxy and fiberglass that we are working on.

In English, students tried to come up with names fitting for the first kayak that Frankford has made. There are still alot of wishes for flames painted on the side of the kayak! Hmmmmm......we will see.

Tuesday, March 2, 2010

A Kayak Takes Shape


Over the last two weeks, students have spent time learning about the steps to building our kayak, and implementing that work. In English they have continued to read about the boat form and what to do next, and in art they have been constructing. We have been discussing and making lists of the boat building and kayak terms that we have learned and used so far. The guys drilled holes in the side panels and keel line of the hull, and stitched both the hull together, and also the side panels to the hull. (The hull is the bottom of the boat and the keel line runs down the middle.) The stitches that we keep referring to are made of copper wire that the boys cut and fasten through holes in the plywood. After alot of work, what used to look like a pile of wood and scraps has turned into the frame of a boat. Student comments have ranged from "whoa, it IS a kayak," to "I'm not getting in that thing, it's flimsy!" We are excited for more progress and possibly a trip to Chesapeake Light Craft in Annapolis, where the boat kits are made. The last, and possibly most important, step that we have done recently, is to measure the art classroom window to ensure that the kayak will be able to LEAVE the room when it is finished!

Monday, February 22, 2010

First Batch of Paint Designs!


Measure Twice, Cut Once!


Before anyone started cutting or drilling through the expensive pile of marine plywood that now decorates the Art room, we thought it might be a good time to have a refresher course or measuring. In the photo, students in Christy Hartman's science class are working on several labs designed to improve their measuring skills. The guys completed exercises in both Science and Math involving measurement.

The guys have also finished their boat paint schemes and we'll be posting them very soon. We'd like everyone to post a comment telling us their favorite design so we can choose a scheme.

I recieved a new tub of epoxy hardener and a few odds and ends in the mail today. We'll start the hull assembly tomorrow!

Friday, February 19, 2010

Row, Row, Row your......that's really a boat??

As the students finally started to believe that the pile of materials and tools in the art room is going to become a kayak, and they read parts of the instruction manual in English, their enthusiasm began to be evident. Today in Art we watched a short portion of the building video that came with the boat kit. The students had a conversation about what parts of the kayak they have become familiar with so far, and we made a list of these terms that will be continued in their boat building journals.


After watching the beginning of the video, we all began sketches of what we think the color design of the kayak should be. When the students finish, we will display all of the ideas, and vote on what we think will work best. The boat will probably be a combination of bright work (finished wood) and colored marine paint.

--Christi

Wednesday, February 17, 2010

And so it begins...

The guys have been reading a Ben Mikaelson novel titled, Red Midnight. In the book, a young Guatemalan refugee escapes his war torn country with his younger sister in a cayuco (a wooden handmade kayak). He faces treacherous seas, pirates, soldiers and near starvation before arriving at his destination in Florida.

So... when the opportunity came up for YBEC Frankford to build a 21' Chesapeake Lightcraft Chesapeake Double kayak kit, we jumped at the chance. The kit is what's called a stitch and glue wooden boat. The wooden panels are literally stitched together with wire before glass and epoxy are added to create a tough and light monocoque shell.

The students will be reading the manual in English class and performing most of the build in Art with Christi. The kit should require around a total of 90 hours to build. We'll build the boat over the next few months and take her out for her maiden voyage during our spring 4-day trip in May.

We'll post photos and updates of our progress on the blog but for now please take a moment to check out the Chesapeake Lightcraft website and the Chesapeake Double here:

http://www.clcboats.com/


-Lane